
Simon Buddle explains why changing the humble back box post-installation can add complications to a project, and provides some useful tips on what to specify in the first place and how to avoid unexpected costs.
There are always little things in life that seem to punch above their weight. Small items that should not be that much trouble or cause so much grief. Opening a new plastic bag, depending on static charge, can take anywhere from 5 seconds to 5 minutes to gain access. Stubbing a toe or getting a splinter cause monumental pain compared to the actual damage to the body. A few years back, a tiny piece of copper wire got pushed under the skin of the pad of my index finger. Gradually it worked its way deeper and further into my finger until it came to rest a millimetre from the bone. It was largely irrelevant other than for those moments when I needed to grip tightly around a bar, at which point that tiny piece of swarf morphed into a searing hot thermal lance that could split rocks. As if the National Health Service did not have enough to deal with, they had to cut my finger open to find and remove the little critter.

And that brings me to the subject of this month’s article; back boxes. To think that there is an article in them might seem ridiculous, but the truth is they are one of those ‘little things’ on a project that really can cause untold mayhem for the KNX integrator.
Make sure the specified back box and intended face plate match
The first, and possibly most important issue, with a back box is that it gets specified at the beginning of the project, but it is not until late on that we discover any associated problems with it, by which time it is often difficult or expensive to resolve. The solution; ensure that you specify the right box and communicate it to everyone. Take for example the humble data and TV socket. Now that is a common box with which most electricians will be familiar. Two coaxial cables and two data cables; again, a common configuration. Stick it all in a double-gang back box and off you go. For this configuration, the important back box detail here is that it is a 47mm deep box. And that is the sticky issue, as most electrical contractors will not have priced for this deeper version. If you have never terminated and installed this arrangement of two coaxial and two data cables, I recommend you try it and at low level. It is tricky, to say the least, and in a shallow back box, almost impossible.
Careful planning
In the world of KNX we have a dazzling array of low-level plates in various configurations. This is a great value add for us, plus it provides an aesthetic that very few can match: high-level and low-level plates all in the same style. That makes architects and interior designers incredibly happy. The backbox arrangement, however, may make us less than happy. Careful planning is required to ensure that the correct backbox array is installed, be it one-, two-, three- or four-gang. Each set of sockets should be thought through, agreed, and documented.
Dealing with mismatches
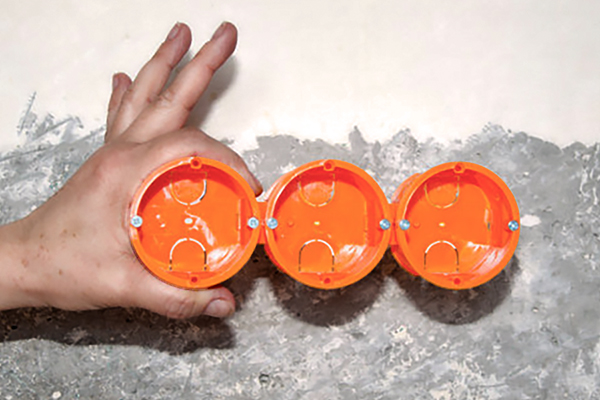
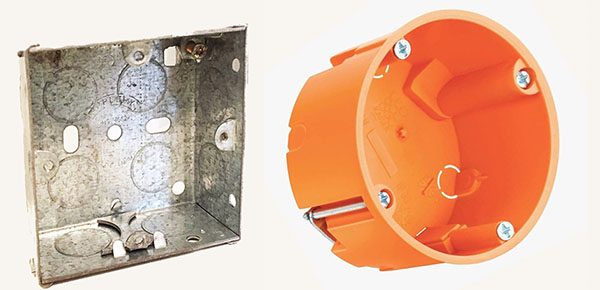
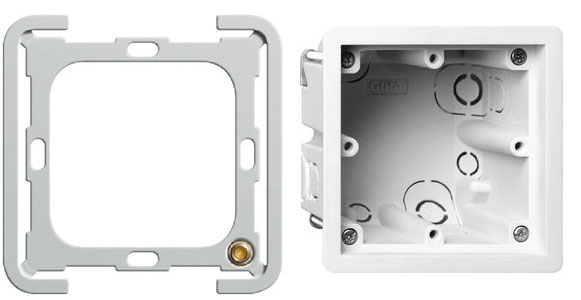
Keypad backboxes come in many formats, although the most commonly used is surely the Kaiser orange single box. Wonderfully easy to install, it is about 75% faster than installing a square backbox and so much more versatile. Most keypads sit quite happily on these boxes, but there are a few exceptions. Jung and Gira for example, have specialist boxes for flush or recessed keypads.
And here is my point. We should understand the back box and the keypad as a complete system or assembly. This is unlike the UK electrical back box that will fit any single-gang faceplate. Once specified, keypad and back box go hand in glove. A change from surface mount to flush mount keypads will also require a change in back box. The same applies when changing from Jung recessed to Basalte, for example.
Check the potential hidden costs
One of the great benefits of KNX is that pretty much all devices are interchangeable. Don’t like one keypad? No problem. Swap it for another brand. Any four-channel dimmer can be used (subject to loads) to replace an older four-channel dimmer. And that is a fantastic benefit to both the integrator and the customer. But with that comes the need to keep a close eye on the little details. In this case the back box. If the keypad changes, be sure to check which back box should be used. If it is different, it raises the question, ‘Has first fix been completed?’ Are the back boxes for the previous style of keypad still in the wall? If yes, then you will need to raise a change order to get them all swapped out. That little change may become expensive if thirty or forty boxes must be replaced.
Conclusion
The endless configurations possible with KNX probably cannot be matched by any other control system. This makes it extremely easy to sell, as we can deal with almost any aesthetic a client might wish for and can certainly provide a technical solution that will solve just about any problem. That might make us a little blasé. So, it is vital that we also keep an eye on those little details that just might turn into an almighty problem if we are not awake to the consequences of changing a back box.
Simon Buddle CEng MIET, is a consultant for Future Ready Homes, a specialist in BMS and ELV services system design.


