 By Nikita Thompson, Ivory Egg.
In Part 1 and Part 2 of this series on heating control using KNX, I discussed getting the temperature onto the bus, the types of control used, the modes available with KNX, using heating and cooling, two-stage heating and the dead band. In Part 3, I will bring all of the above together to show how KNX can control under-floor heating (UFH).
UFH is becoming the most popular heating source when constructing new builds, as it is proven to be one of the most comfortable and efficient heating systems. In order to achieve maximum comfort and get the most from your system, the right control should be put in place and this can be achieved in a simple way with KNX.

As discussed previously, there are a number of KNX thermostats available. Once you have selected the thermostat and set the parameters for the type of control you want and how the modes are to work, the thermostat will send a demand to the heating source. In this article I will discuss the process of using UFH as that source.
As a KNX professional, if you are only looking after the control side of the application, there should be a clear understanding of where the line between your responsibilities and those of the heating engineer lie. In an ideal world, the UFH system should be fully commissioned and proven before the KNX integrator gets involved with any sort of control. But as we all know, this is often not the case, and knowing the basics of how the UFH system works can help troubleshoot when commissioning the system.
There are two main types of UFH, namely electric and hydronic.
Hydronic UFH
With hydronic, hot water passes through pipes and transfers heat up into the room, with the level of heat being dependent on the depth of the pipes. In order to maintain an even distribution of heat, the pipes should be run in a coil, as shown below.
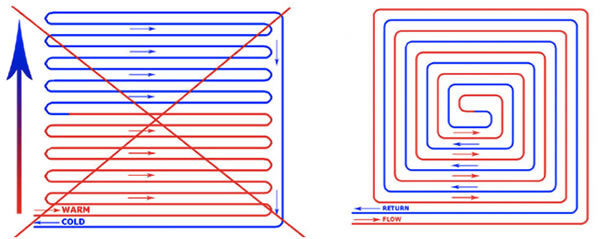
Depending on the size of the floor, it is not uncommon for a room to have more than one coil. For example, a large open-plan living and dining area may require two coils. Similarly, two small rooms together such as an en-suite shower room and a walk-in wardrobe can be heated by just one coil.
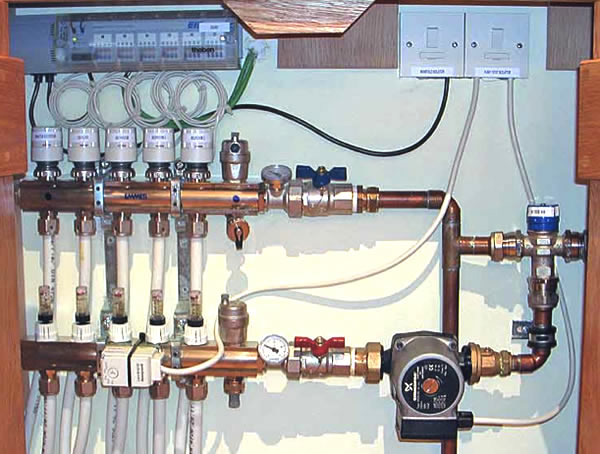
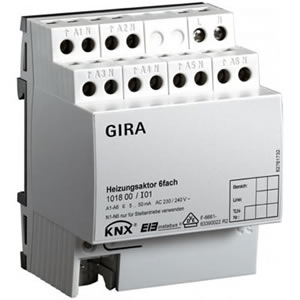
Each coil is connected to a manifold and each zone on the manifold is controlled with an electro-thermal actuator. This is then connected to a KNX manifold controller.
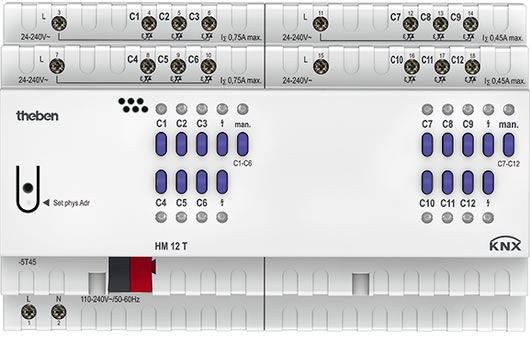
Depending on the controller chosen, there is often the option to connect two zones to one channel. This is particularly useful when two coils are needed for a larger room. When using hydronic under-floor heating, boiler control must also be considered (see Simon Buddle’s article on how to make the most of your client’s boiler).
Electric UFH
There are two types of electric under-floor heating. The most common is when an electric heating element is integrated within a mat and fitted underneath the floor. This is usually found in bathrooms and retrofit applications. The second type, which is less common, is a large element cable that is attached to the flooring rebar grid before concrete is poured. All of the element tails will be brought back to a central point and controlled with an appropriately-sized relay, although one should bear in mind that these will have large loads. While electric UFH is highly responsive, it can be expensive to run.

Considerations when controlling UFH
There are three considerations to make when controlling under-floor heating:
1) Maintained Air Temperature
The most common way to control under floor heating, maintained air temperature takes its demand for each room from the KNX thermostat.
2) Maintained Floor Temperature
Often used in bathrooms and other tiled areas, this ensures a minimum comfort temperature at all times. To achieve this, a floor probe is required, either used as an input on the room controller with a weighting in favour of the floor, or as a separate control loop.
3) Over Temperature Cut Off
This is used with electric UFH or as a safety mechanism for certain floor types such as delicate wood finishes. The simplest way to achieve this is to install a floor probe with a separate thermostat. This gives clear definition between the standard thermostat and the ‘over temperature’ override.
In all cases, it is recommended to use a PI command that will be transformed into a PWM in most manifold controllers. This prevents under- and over- shooting of the set room temperature. You can read more on this type of control in Part 1 of this series.
Other Considerations
There are a few other things to keep in mind when dealing with UFH control.
• Monitor water temperature
With hydronic heating, it is important to monitor the temperature of the water that is used to heat the floor. This can be managed at the manifold or on the pipe itself. Depending on the specification, there may be a variable temperature valve that must be controlled.
• Check water flow rate
If you are having issues with the heating control but you are confident that the KNX aspect of the installation is running smoothly, there are some general checks that you can make. For example, it is important to ensure that the water is not pumped too strongly through the valve heads. If too fast, the water will cause the system to run inefficiently. Too slow, and the floor will rarely heat up fully. Depending on the pipe length, the flow rate should be set to ensure optimum heat transfer to the floor.
• Check labelling and take photos and thermal images
The outgoing circuits from the manifold must also be checked as they are often labelled incorrectly. This can result in one room being hotter than another, or, in the worst-case scenario, a room will not be heated at all. It is best practice to take photographs of the installation before the floor is laid. It can also be a good idea to use thermal imaging to determine whether the system is working efficiently.
Conclusion
Under-floor heating is a highly-efficient method of heating, and KNX provides integrators with the control needed to get the most from the system.
In this three-part series, I have explained how to get temperature onto the KNX bus, the three regulation types, the four standard modes used with KNX thermostats, two-stage heating and cooling, and finally, the basics of UFH. I hope that you now have an understanding of how to use KNX to control heating, and have the confidence to explore this area more in order to provide your clients with the most effective and comfortable heating system.
Nikita Thompson is the Technical Sales Manager at Ivory Egg (UK) Ltd, a supplier of leading KNX products and provider of KNX training courses. Ivory Egg runs a number of training courses on how to achieve heating/cooling control with KNX.


